Updating Assets
Users assigned to the Equipment Custodian role within the AMS will retain the same level of functionality and authority that was granted to the role within the prior EMS. In addition, the AMS grants Equipment Custodians with the ability add comments, photos and attachments to the records in order to assist departments with appropriate asset documentation.
This guide was created to assist departments with understanding the assignable system roles, navigation, and features. If you have any questions that are not answered within this guide please send your inquiry to amsfeedback@ucr.edu.
Quick Navigation
Equipment Custodian Editable Elements & Data Fields
The following fields are available for Equipment Custodians to modify on all assets within their assigned accountability structure. While it is not mandatory that all of these elements and data fields are maintained by departments, it is highly encouraged that departments keep as much information as is needed on record to assist with the accurate and timely accountability of their assets. Additional details (especially photographs) assist with reducing inventory completion time, federal reporting, and both internal and external audits.
-
General Information Fields
The following general information fields are editable by Equipment Custodians and should be reviewed and updated (as needed) at least once annually:
- Alternate ID (Recommended Field): This is an optional free form field for Department Custodians to assign any identifier to an asset that would assist the department with asset management processes. This can be used by departments if they are maintaining their own inventory tracking system, or alternatively it can reference other university assigned identifiers such as the Fleet assigned vehicle numbers. It is not a required field thus leaving it blank is also an acceptable option.
- Assigned To (Recommended Field): This is an optional field that can be used to associate assets with their primary user. The field data is populated with the names of the potential campus users from the Central Authentication Service (CAS). Please note this field is intended to denote the primary user and/or point of contract for the asset to assist with asset administration. It does not grant individuals the authorization to use an asset that they have not been previously authorized to use.
- Serial No (Mandatory Field): This is a required data field for all Inventorial Equipment records. It is the department Equipment Custodian's responsibility to complete this information. Equipment Custodians should add the serial data to the AMS as soon as possible upon notification of new asset record creation.
- Condition Code (Mandatory Field): This is a federally required field which Equipment Custodians need to update annually during the inventory process. The field is the combination of two alphanumeric characters to describe the assets general condition.
- The first character can be assigned to:
- N (New),
- E (Used, Reconditioned),
- O (Used, without Reconditioning), or
- R (Repairs Needed);
- The second character can be assigned to:
- 1 (Excellent),
- 2 (Good),
- 3 (Fair), or
- 4 (Poor).
- By default all newly acquired assets are set to N1 (New, Excellent).
- Usage (Mandatory Field): This is also a federally required field which Equipment Custodians need to update annually during the inventory process. It is used to report asset utilization rates with a value of 100% meaning the asset is in continual usage, while a value of 0% would mean the item is not being used currently. It is the intent that these values also be used to assist departments with understanding what assets could be sent to the Surplus Operation or repurposed within the University.
The above mentioned fields are all located in the General Information Tab of the Edit Asset Screen. All other fields in the General Information Tab can only be modified by the Office of Equipment Management (AMS Administrator). If any modifications are required to the other fields please send an email request to the Equipment Manager at amsfeedback@ucr.edu.
-
Location (Mandatory Fields)
The location fields should be updated by departments as often as is reasonably required to accurately reflect the current location of each Inventorial Equipment asset. If an auditor chooses to take a sample of a departments Inventorial Equipment, it is the expectation that all the asset records will accurately reflect the current physical room location of each asset.
If the asset is located on the university property the "Asset Located On University Property" checkbox on the asset needs to be set to True (checked) and the department will need to complete the following location fields: Site, Building, Floor Number and Room Number. If instead the asset is not located on university property the "Asset Located On University Property" checkbox needs to be set to False (unchecked) and the department will instead provide the address in the Location Description field. Please note: Inventory Equipment assets should not be removed from university property without appropriate authorization.
-
Comments (Recommended Field)
Comments can freely added and removed by AMS users to any asset record within their assigned accountability structure. It is recommended that any important details that would assist with the location and/or identification of an asset be included in the comments section of the Edit Asset screen. Any comment made in the AMS can be subsequently removed from an asset record by the individual who originally added the comment.
-
Attachments (Recommended Field)
Documentation and images can be attached by Equipment Custodians to the asset records. It is highly recommended that the department utilize the Overview Image function in the AMS to assist with the identification of assets. For audit purposes the attached documents cannot be removed directly by the Equipment Custodian role, if any attachment needs to be removed please contact the Office of Equipment Management via email to amsfeedback@ucr.edu.
|
Navigating to the Edit Asset Screen
Please follow the process below to navigate to the Edit Asset Screen.
-
Locate the Asset Record via Search
Follow the steps in the Searching Assets Section of this guide for locating the record of the asset that the individual in the assigned Equipment Custodian role intends to modify.
-
Select the "Edit" or "Edit In New Tab"
Depending on the Search Results View (as defined in the Searching Assets - Search Results Views Section of this guide) being used, the Edit Asset Screen for an asset is accessed by slightly different methods.
If in the Datasheet View
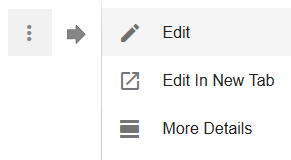
Click on the Actions Icon (shown below) that is on the far right of the table for the line of the asset you wish to modify, and then select either "Edit" or "Edit in New Tab".
If in the Tile View
Click the “Edit” option located in the lower left corner of the asset tile associated with the asset that you wish to modify. In this view there is no "Edit In New Tab" option available, however, navigating to the Edit Asset Screen and then returning to the Search Assets Screen will not impact the prior queried search results as the Search Results are persistent until a new search is initiated or the user logs out of the AMS.
|
Editing Assets
This section covers the process for updating the General Information Fields, Location, Comments, and Attachments as referred to in the above Equipment Custodian Editable Elements & Data Field Section of the guide.
Updating General Information Fields
-
Navigate to the Edit Asset Screen
Follow the steps in the above Navigating to the Edit Asset Screen Section of this guide to locate the asset record that needs to be updated.
-
Click on the “General Information” Tab
This tab is the second tab from the left on the Edit Asset Screen navigation.
-
Update the Desired Fields
The five General Information Fields, as described in the above Equipment Custodian Editable Elements & Data Field Section, are distributed across the three first sections of the General Information Tab. The first section is for the Asset ID and it contains the Alternate ID Field (shown below). This field can contain any additional identification field desired by the department.

The second section is for the Department Information, and it contains the Assigned To Field (shown below). This field can be used to denote the primary user and/or contact for the asset to assist with asset administration.

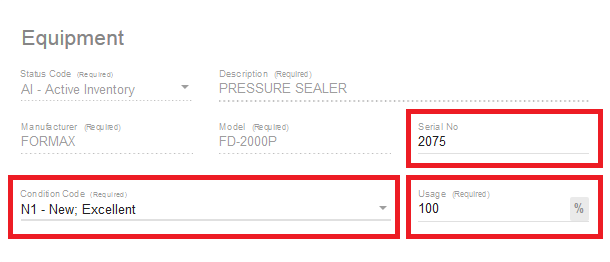
The third section is for Equipment Information, and it contains the Serial Number, Condition Code, and Usage Fields (shown below). Unlike the first two above mentioned general information fields, these fields are required to be maintained by the department. The Serial Number Field must be updated by the department Equipment Custodian as soon as possible following the record creation. If no Serial Number is present on the asset, update this field to "N/A". The Condition Code and Usage fields will be set to "N1" and "100%" respectively, by default for a majority of new asset records (i.e. New, Excellent Condition, and utilized 100% of the time). During the inventory verification processes these fields should be reviewed and updated as appropriate to meet university policy and federal regulations.
-
Click on "Save"
Once the fields have been updated click on the Save button at the bottom of the General Information Tab to process the changes. Navigating to the various Edit Asset Tabs will not result in the updates being lost, however, the Save button must be clicked prior to leaving the Edit Asset Screen or any updates entered will be discarded.
|
Updating Location
-
Navigate to the Edit Asset Screen
Follow the steps in the above Navigating to the Edit Asset Screen Section of this guide to locate the asset record that needs to be updated.
-
Click on the “Locations & Verification” Tab
This tab is the third tab from the left on the Edit Asset Screen navigation.
-
Update the Asset Location
Depending on if an asset is located on or off University Property a different set of fields will need to be completed to input the assets location. Please note that assets should not be removed from University Property without appropriate authorization.
For Assets Located on University Property
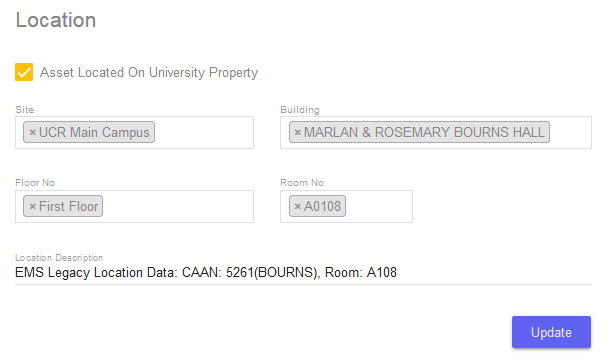
If the asset is located on the university property the "Asset Located On University Property" checkbox needs to be set to True (checked). The AMS will then display the following location fields: Site, Building, Floor Number and Room Number. These fields do have an order of hierarchy and as such they need to be completed in the order they were listed in the prior sentence. The data for these fields is based on the university's Facility Management System (FMS). Occasionally there will be situations where the exact location is not available in the AMS based on the FMS data lookup, in these cases, please select the nearest location available and use the Location Description Field to elaborate as necessary. For the initial transfer of data from the EMS to the AMS the Location Description Field reflected the legacy CAAN and Room number data from the EMS to assist departments with repopulating the required Location data fields.
For Assets Located off University Property
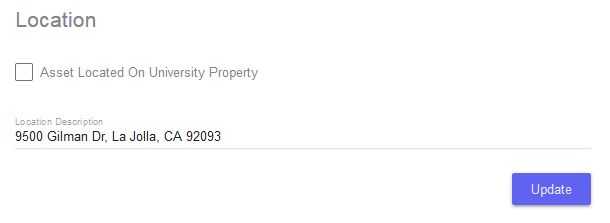
If the asset is not located on university property, the "Asset Located On University Property" checkbox needs to be set to False (unchecked). This will remove the Site, Building, Floor Number, and Room Number fields and instead provide only a Location Description Field (as shown below). Please enter in the most precise location of the asset available for all off campus assets.
-
Click "Update"
Once the location fields have been updated click on the Update button at the bottom of the Location section to process the changes. Please note that all the location fields are required to be completed or the AMS will reject the location update.
|
-
Navigate to the Edit Asset Screen
Follow the steps in the above Navigating to the Edit Asset Screen Section of this guide to locate the asset record that needs to be updated.
-
Click on the "Comments" Tab
This tab is the fifth tab from the left on the Edit Asset Screen navigation.
-
Type Comment and Click on "Add Comment"
Enter in the desired comment in the "Enter a Comment" Field. Once complete the comment is submitted by clicking the Add Comment button at the bottom of the Comments Tab. Please use this comment functionality as liberally as necessary to account for the asset. There are no current system limitations to the number of comments submitted to each record and any comment added can be subsequently removed by the user that submitted it. Please note that request for EIMR's or data field changes should not be made in the comments section of the record. EIMR's need to be requested in the Disposition & Cost Adjustments Tab, while data field update request (for changes the Equipment Custodian cannot directly make) should be sent to the Office of Equipment Management via email to amsfeedback@ucr.edu.
|
Adding Attachments (Documentation & Images)
-
Navigate to the Edit Asset Screen
Follow the steps in the above Navigating to the Edit Asset Screen Section of this guide to locate the asset record that needs to be updated.
-
Click on the "Attachments" Tab
This tab is the sixth tab from the left on the Edit Asset Screen navigation.
-
Upload the Attachment
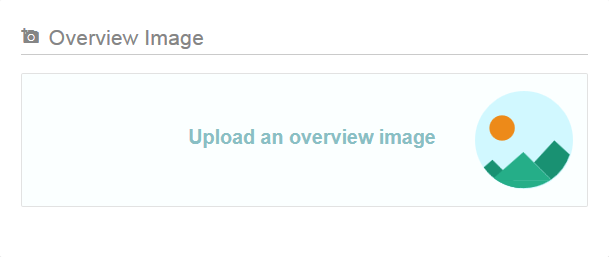
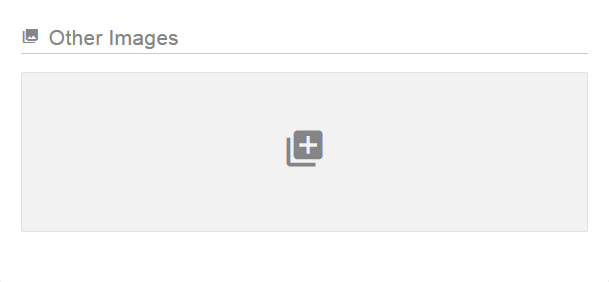
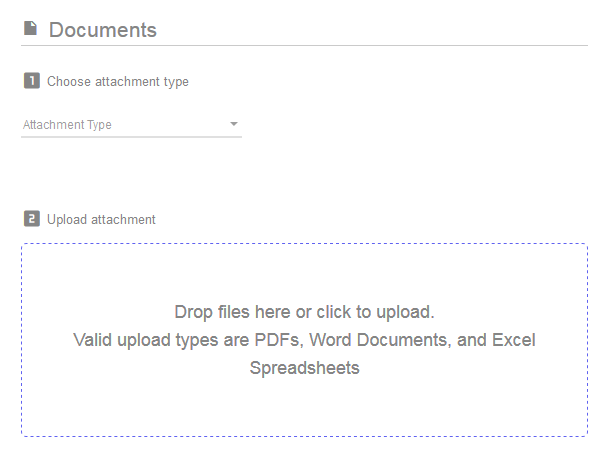
The AMS has three sections for attaching files: Overview Image, Other Images, and Documents. The Overview Image is the picture that will be displayed on the Tile View of a queries Search Results. Departments are encouraged to upload Overview Images in order to facilitate the inventory verification, auditing, and reporting of equipment assets. The Other Images section can be used to attach other photos of the asset. It is recommended that photos of the assets identification markings (such as the serials, plates, VIN numbers, etc.) are added to this section. The Documents section is used for attaching any documentation that may be pertinent to keep on record (such as documents for the receiving, approval, transfer, loan, etc.). Please note that currently attachments can only be removed by the Equipment Manager (Administrator), if an attachment needs to be removed please contact the Office of Equipment Management via email to amsfeedback@ucr.edu.
Attaching an Overview Image
Since this is the image that is displayed for Search Results, only one overview image can be set at a time. To add an overview image either click on the "Upload an overview image" box and navigate to the desired file or drag an image file into the "Upload an overview image" box.
Attaching Other Images
All other images can be attached to the asset record by essentially the same method as described above in for the Overview Image. Either click the Other Images box and navigate to the desired file(s) or drag the selected file(s) into the Other Images box. There are not currently any limitations to the number of images that can be added to this section, but discretion should be used to only attach meaningful information.
Attaching a Document
PDFs, Word Documents, and Excel Spreadsheets can also be attached to asset records by essentially the same process as images with the exception that an Attachment Type must first be designated. Clicking on the Attachment Type field will bring down a list of document categories. Please select the best fit for the document being attached to the record, if none of the categories are appropriate select "Other". Once the category is selected either click the "Upload attachment" box and navigate to the desired file(s) or drag the selected file(s) into the box. There are not currently any limitations to the number of documents that can be added to this section, but discretion should be used to only upload pertinent documents.
|
Submitting an Equipment Inventory Modification Request (EIMR)
Below is the general process for submitting an EIMR. For more information on specific requirements please see the Dispositions & Transfers (EIMR's) Section of this guide.
-
Navigating to the Edit Asset Screen
Following the steps in the above Navigating to the Edit Asset Screen Section of this guide and follow the instructions to locate the record of the asset that needs to be requested for disposition or transfer
-
Click the “Dispositions & Cost Adjustments” Tab
The Disposition & Cost Adjustments tab is the rightmost tab on the Edit Asset screen.
-
Click on the New Entry Icon (Yellow Plus)
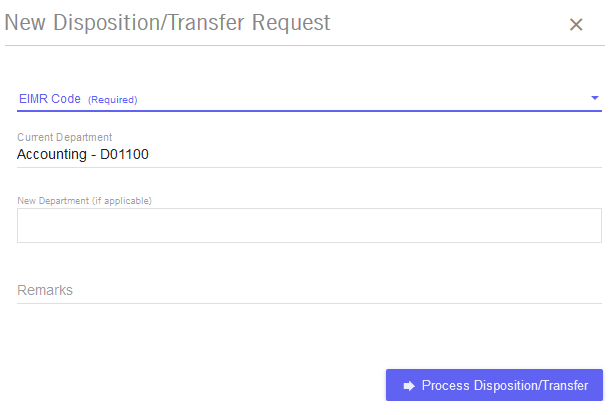
Upon clicking the icon (shown below) the AMS will bring up the "New Disposition/Transfer Request Screen". Please note that multiple EIMR's cannot be submitted in the AMS for an individual record, and in the current AMS implementation, an EIMR cannot be cancelled by an Equipment Custodian after submission. If a current EIMR request needs to be cancelled please contact the Office of Equipment Management via email to amsfeedback@ucr.edu.

-
Complete the New Disposition/Transfer (EIMR) Request
To submit a disposition or transfer the Equipment Custodian must fill in the EIMR Code Field, New Department Code Field (if applicable), and the Remarks Field. The EIMR Code Field corresponds to the type of disposition (lost, destroyed, theft, or trade-in) or transfer (interdepartmental or surplus) the department is requesting. The Current Department Field will always be prepopulated based on the asset being disposed or transferred. The New Department Field should be left blank unless the EIMR is specifically for an interdepartmental transfers (transfers between two UCR departments). Depending on the type of action being requested different information is required to be included in the Remarks Field in order to ensure adherence to University policies. For more information on the EIMR requirements for the various EIMR Codes please see the Dispositions & Transfers (EIMR's) Section of this guide.
-
Click “Process Disposition/Transfer”
Upon submission, the EIMR will be routed to the Equipment Manager (Administrator) for review and an entry will be made to the assets Disposition / Transfers Table with the "Awaiting Approval" status icon. If approved, the asset will be either be set to the “II - Inactive Inventory” (for disposal request) or the Department Code on the asset will be changed to the requested accountability structure (for transfers request) and the status icon will be changed to the "Approved" icon. If rejected, the status icon will be switched to the "Denied" icon and the Admin Remarks field on the Disposition / Transfers Table will denote the reasoning behind the denial. Please see this image below for references on these three status icons.

During the initial phase of the AMS release, the EIMR's can only be viewed from each individual asset and there is not currently any notification functions for Department Custodians built into the EIMR workflow. This is an area that is intended to be addressed in a future phase of the systems release.
|


